When I (Joe) first bought the van as a tin top Syncro it had the stock 2.1L in it for an engine. It ran great and I never had any problems with it but I wanted more power and the stock model just couldn't give it to me.
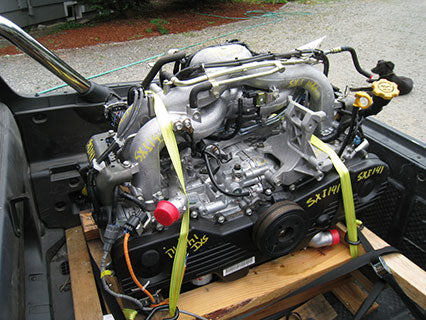
I sold the 2.1 to a guy who was doing a restoration on a stock van and replaced it with a 2002 Soobie 2.5L SOHC... which I drove ridiculously hard and blew a head gasket. Here is the old Subaru 2.5 engine:

For the next year, my poor van sat in the driveway collecting moss. When I moved, I tried to start it to see if she could limp over to her new home. She couldn't. I can't believe at that point I considered selling her and getting out of Vanagons for good! What was I thinking?! My wife convinced me otherwise and we loaded her onto a flatbed trailer to get her to our new home. Where she sat for another year collecting more moss.
And then the earnest restoration project began. Here is Das Mule before the transformation began: backed into the garage bay awaiting engine surgery.

As of the writing of this post in 2014, Das Mule is still running engine number three -- a 2007 Subaru 2.5L SOHC with variable valve lift. I picked it up with only 11K miles on it in great shape. This time I did the complete conversion -- not just the engine block, but all the parts and hoses that connected the engine to the rest of the van as well.
Here is the new engine arriving at the house. We picked it up in the Subaru Baja we owned at the time. It was in great shape (like new) and included the wiring harness.

Since we don't own a lot of heavy lifting equipment, we had to improvise a little hoisting the engine into place. Here it is on a cart roller and we supported the transmission nose by the output shaft with a cargo strap. You can also see the stainless steel coolant lines we installed due to all the issues that arise with the stock plastic ones.

We also built our own "engine lift" out of a 120v winch and a custom support frame. Here is Joe winching the new heart of Das Mule into place.

The photo below shows a bit of the wiring that had to be done once the engine was mounted in place. The majority of the wiring harness modifications were done ahead of time before we put it in the vehicle.

Exhaust system detail shown below: stainless steel headers, stock J pipe and Magnaflow exhaust.

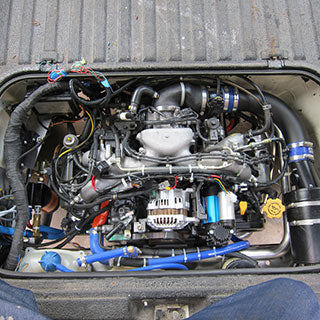
Here is the whole engine completed and installed:
An up close shot of the ARB 12v air compressor we mounted where the stock A/C compressor usually sits:

Shown below is a custom intake air system. Starting at the engine intake flange a Cobra 90 degree coupling, a mass airflow sensor fitting, 3" blue silicone hose , and then a 90 degree mandrel bent aluminum tube (surplus Boeing aircraft component!), followed by another section of blue silicone and ending at a custom air filter housing. All attached with stainless steel hose clamps.

Below is a close up of a remote oil filter adapter plate with lines running up to the remote oil filter.

We also upgraded to a 160 amp alternator to support all of the additional accessories, lights and winch.

